
Use this when assigning page-by-page in Page Overview would take too long.
Navigate to the QC Acknowledgements menu
-
Open the space and, from the left sidebar, look for the Space apps menu.
-
Click QC R&U - Space Overview.
-
Click Acknowledgements.
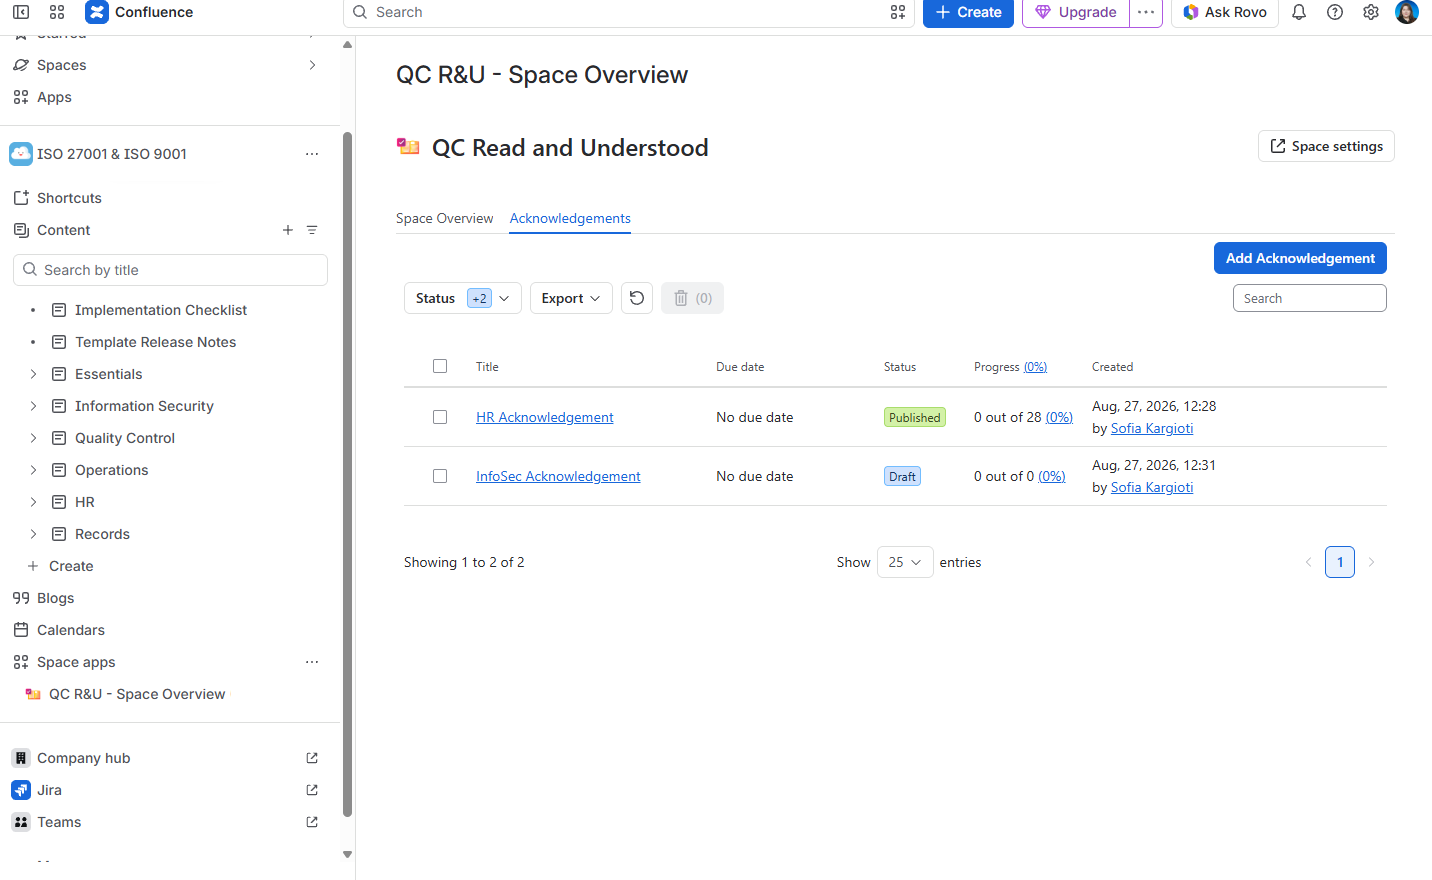
You should see: A table of acknowledgements and Add Acknowledgement.
If you cannot open this tab, Space Settings may restrict it to space admins.
Step 1: Create an Acknowledgement and add users and pages
-
Click Add Acknowledgement.
-
Type a title and a short description.
Step 2: Choose how you want to add users
QC Acknowledgements lets you add users in two ways:
-
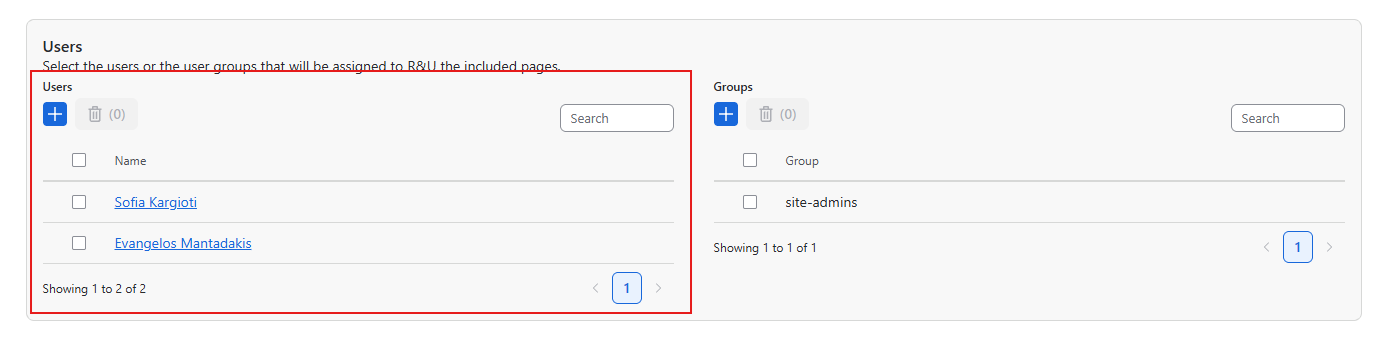
As individual users:
-
Scroll to the Select Users section and locate the Users table
-
Click the
+button and search for the users by username -
Select the user and click Add.
-
-
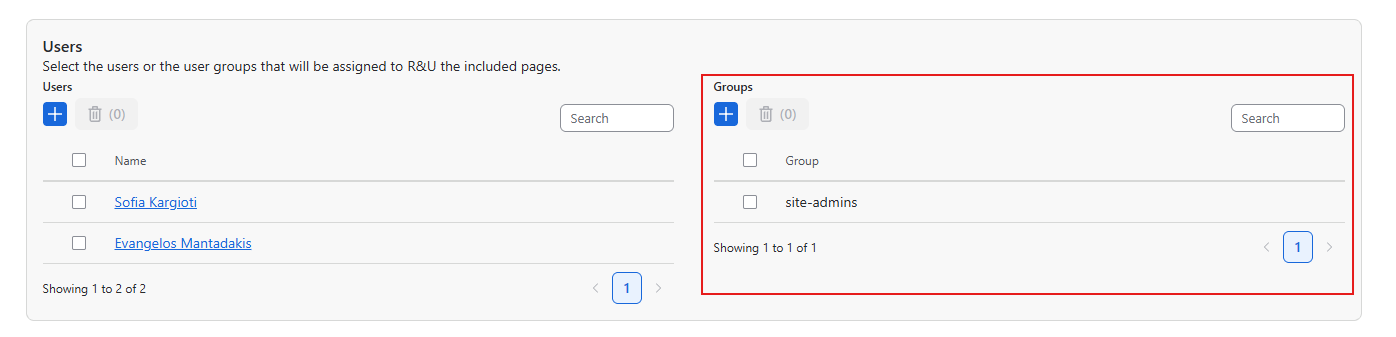
As group members:
-
Scroll to the Select Users section and locate the Groups table
-
Click the
+button and search for the group -
Select the group and click Add.
-
Step 3: Select pages
QC Acknowledgements lets you add pages in three ways:
-
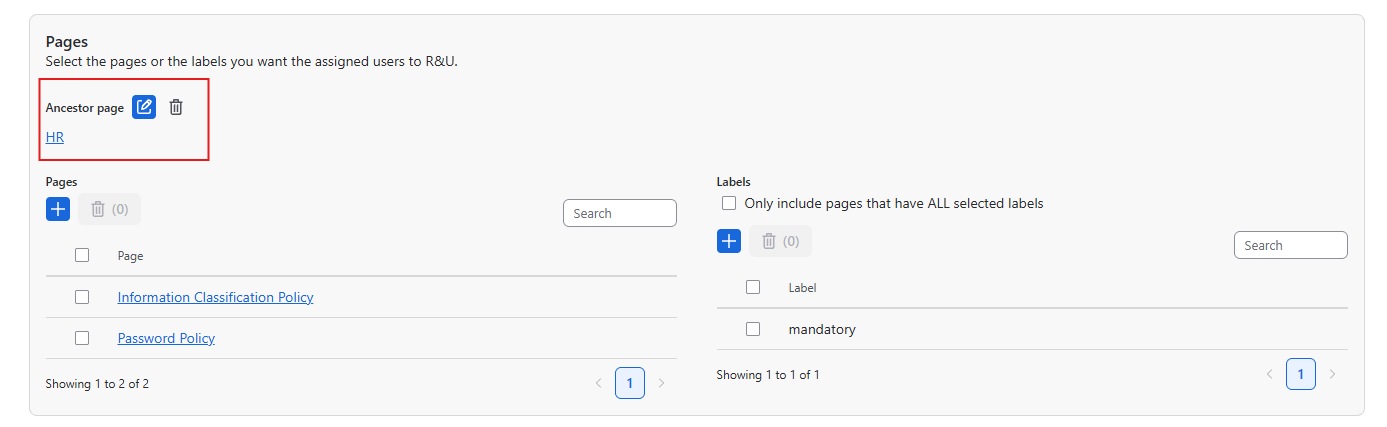
Based on Ancestor:
-
Scroll to the Select Pages section and locate the Ancestor field
-
Click the
+button and search for the page by title -
Select the ancestor and click Add.
-
-
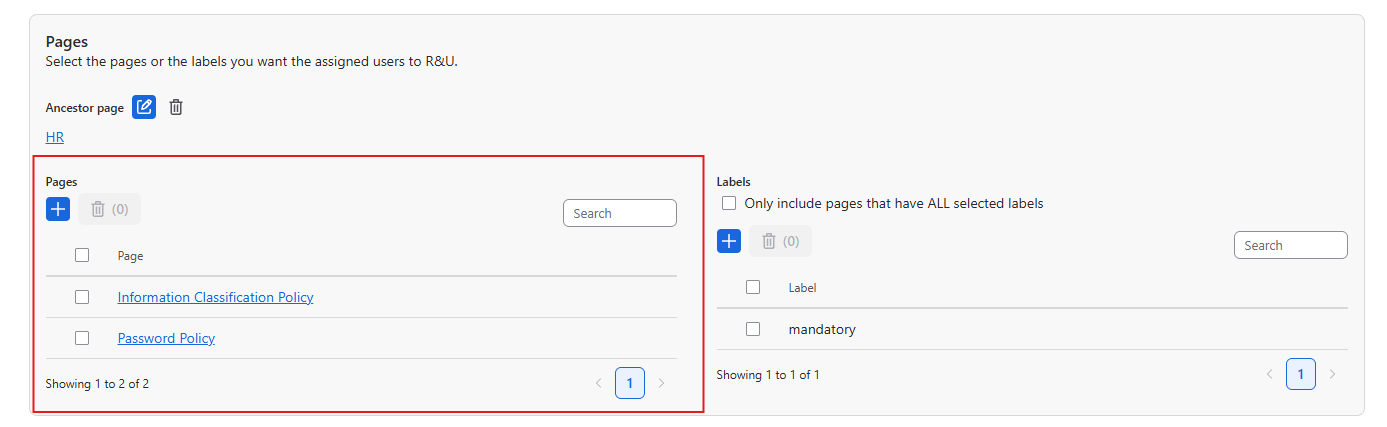
As individual pages:
-
Scroll to the Select Pages section and locate the Pages table
-
Click the
+button and search for the pages by title -
Select the pages and click Add.
-
-
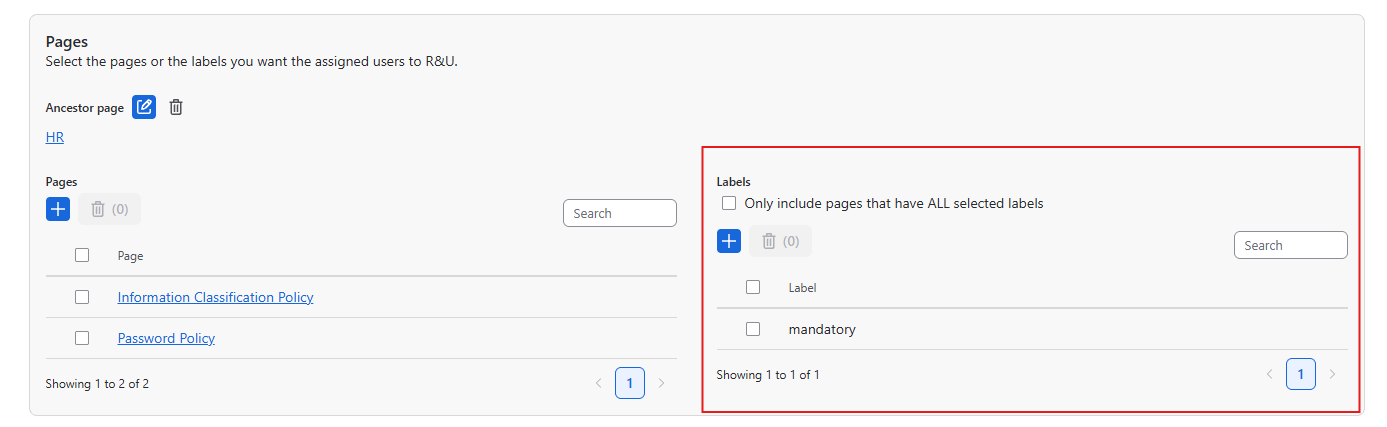
Based on labels:
-
Scroll to the Select Pages section and locate the Labels table
-
Click the
+button and type the label -
Select the label and click Add.
-
Step 4: Publish Acknowledgement
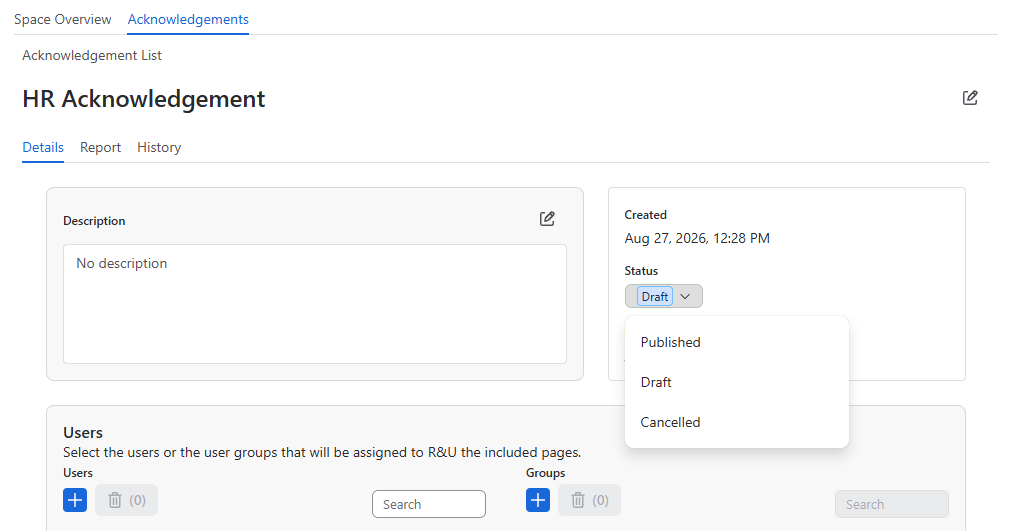
The default status of all Acknowledgements is draft. Saving a draft Acknowledgement doesn’t publish it. To publish an Acknowledgement, you need to change its status from the top of the page to Published.
Steps:
-
Change the Acknowledgement status to Published.
-
Choose whether you want to send a notification to the assigned users or not.
Optional settings
|
Setting |
What it is |
|---|---|
|
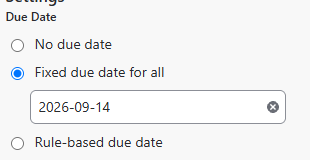
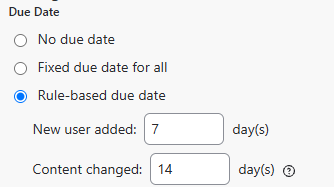
Due Date |
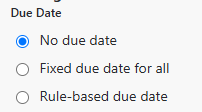
You can choose one of the following settings:
|
|
R&U Expiry |
Tick “R&U confirmations should expire”, and then set Expiry frequency (Every day/week/month/year). 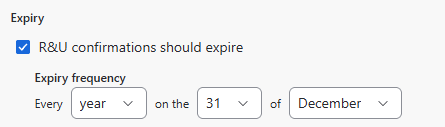
If you set expiry based on months, you can choose every N months and the exact day of the month (for example, every 4 months on the 1st). 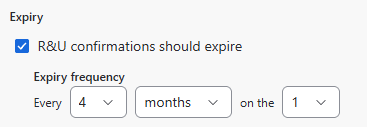
|
|
Event notifications |
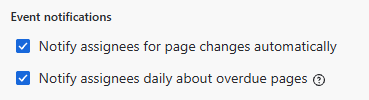
With Acknowledgements, you can:
|
|
Automated reminders |
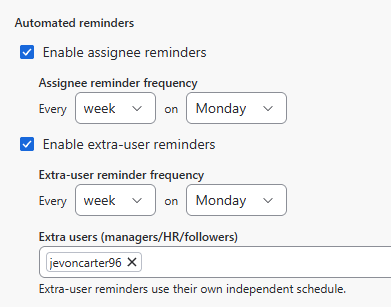
QC Acknowledgements sends automated reminders in two cases:
|
Keep track of the Acknowledgement process
-
Go to Space apps → QC R&U - Space Overview → Acknowledgements
-
Find the acknowledgement on the list and open it.
-
Navigate to the Report tab.
-
Depending on the way you work, you can set the display to:
-
By User list: the parent table shows each one of the assigned users. Opening a table for a certain user will show their R&U status for the pages of the Acknowledgement, including the date of R&U and the version of the page (if available).
-
By Page list: the parent table shows each one of the included pages. Opening a table for a certain page will show all assigned users and their R&U status for that page, including the date of R&U and the version of the page (if available).
-
When choosing the display by Page list, you can also filter the table based on whether the Byline is enabled on the pages or not.
-
-
Click Update to apply filters.
Another way to track your Acknowledgement’s progress is to use the QC R&U - By Acknowledgement macro on a Confluence page.
Does QC Acknowledgements collect traceable, auditable signatures?
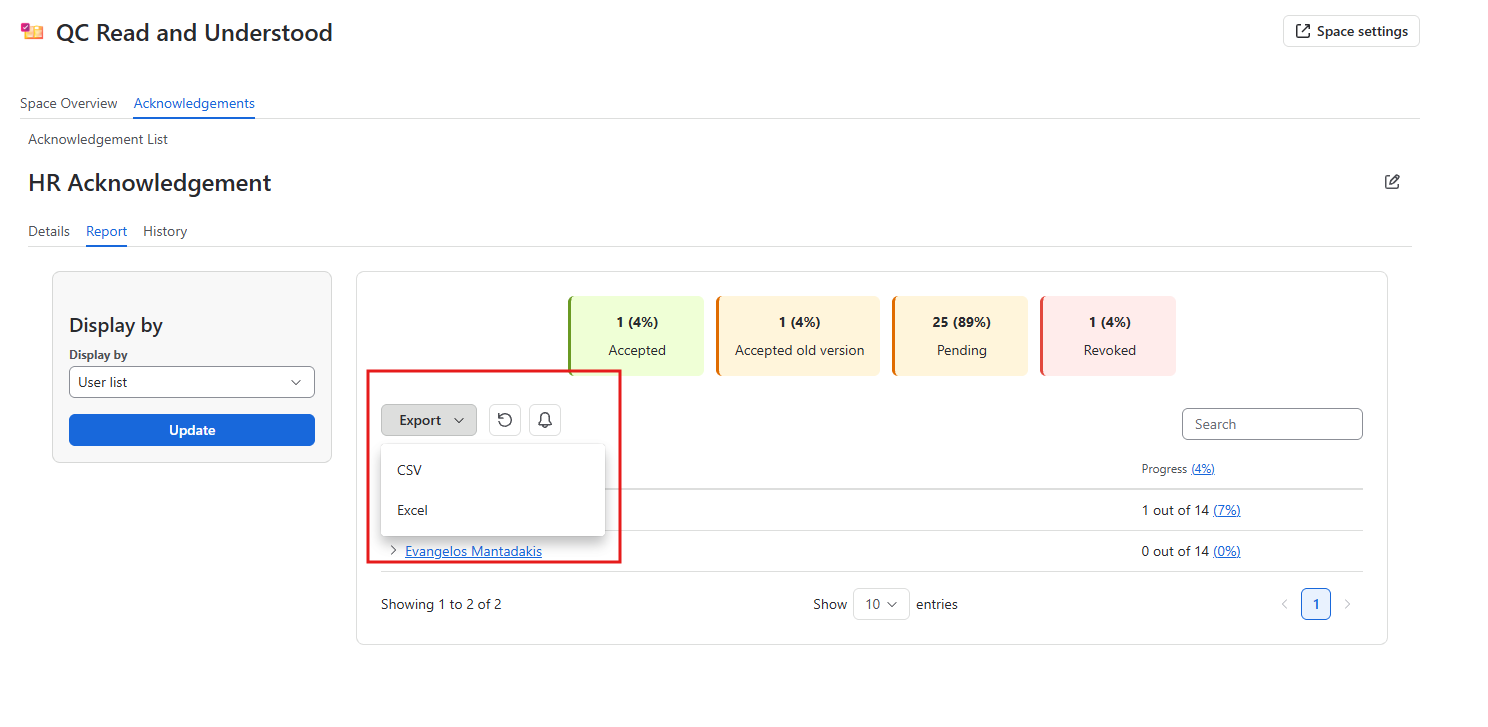
Yes, the QC Acknowledgements → Report and the QC R&U - By Acknowledgements macro collect traceable signatures, showing the name of the user, the date they confirmed the R&U, and the version. Export these tables to CSV and Excel for auditing purposes. (See section “Export Acknowledgement data” below).
Manually remind users of their Acknowledgement
-
Go to Space apps → QC R&U - Space Overview → Acknowledgements
-
Find the acknowledgement on the list and open it.
-
Navigate to the Report tab.
-
Set the display to by user or by page (depending on your workflow)
-
Click Send reminder, type a custom message (optional), and click Send.
Export Acknowledgement data
-
Go to Space apps → QC R&U - Space Overview → Acknowledgements
-
Find the acknowledgement on the list and open it.
-
Navigate to the Report tab.
-
Set the display to by user or by page (depending on your workflow)
-
Choose to export the table to CSV or Excel.
Edit and Delete an Acknowledgment
To edit an Acknowledgement, find it on the list and open it. Now you can change the title, description, due date, people, or pages.
You can delete draft and cancelled acknowledgements from the list. Published Acknowledgements cannot be deleted. To delete a published one, change its status to Cancelled and then proceed with the deletion.